Your voice is like a superpower. It can connect with people, express your feelings, and make them remember what you say.
But people won’t listen if they can’t hear you, whether you’re on a podcast, YouTube, or making videos.
How to make your voice sound better when recording? Take a few steps, and you’ll be a pro. Your listeners will love you for it.
Key Takeaways
– Start with a good USB microphone, like the Blue Yeti or Audio-Technica AT2020USB+. Use pop filters to reduce “popping” noises.
– Record in a quiet, closed-off area. Use blankets, curtains, and soft items to reduce background noise and echo.
– Before recording, do vocal exercises like humming, tongue twisters, and deep breaths to keep your voice flexible and clear.
– Position your microphone correctly. Hold it gently about a fist away from your mouth to avoid unwanted noises.
– Familiarize yourself with gain, volume, and polar patterns. Tailor these settings to your environment and recording style to ensure optimal sound quality.
– Use free programs to reduce background noise, adjust EQ settings, and apply compression for a polished sound.
– Regular practice and feedback from others will help you improve. To enhance your recordings, focus on specific areas like clarity and tone.
7 Steps To Make Your Recording Voice Sound Better
Annoying noises, echoes, weird mic placement, and even the room you’re in can make your recording sound bad.
Take these steps to ensure your recording sounds best.
Step 1: Proper Equipment Selection
Choosing the right equipment is essential, even for beginners. Good gear ensures your voice sounds clear, rich, and professional.
USB mics are ideal for beginners. They are easy to use, plug directly into your computer, and are affordable.
Popular choices include the Blue Yeti and Audio-Technica AT2020USB+.

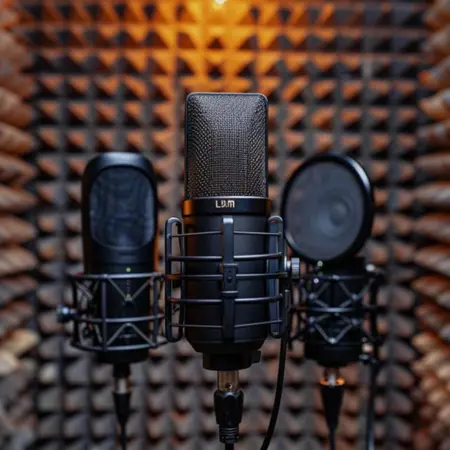
Consider an XLR mic like the Shure SM58 or Rode NT1-A for even better recordings.
These offer superior sound but need an audio interface to connect to your computer.
With these, use pop filters. They block those annoying “popping” noises you get when you say things like “p” and “b”.
Step 2: Optimizing Recording Environment
Where you record matters! Background noise and echo can interfere with your recording.
A quiet, closed-off space is essential to avoid distractions like noisy streets or barking dogs.
Even a closet can work well, as clothes help absorb sound.
Try these tips:
– Close windows and doors to block outside noise.
– Hang thick curtains or blankets to muffle sounds.
– Add soft items like pillows or blankets to absorb sound and reduce echo.
You can create a simple setup at home. Use blankets, pillows, or towels to absorb sound.
These tips can create a better recording environment and improve your sound quality.
Step 3: Warm-Up And Vocal Exercises
Warming up your voice before recording is like tuning an instrument. It keeps your voice in top shape, makes it more flexible, and helps you sound amazing.
Get your voice ready with these exercises:
– Motorboat: Make a “brrr” or “vrrr” sound to loosen your mouth and tongue for clearer speech.
– Humming Tune: Hum a comfortable note and slide up and down. This helps you hit the right notes and sound strong.
– Tongue Twisters: Practice phrases like “Peter Piper picked a peck of pickled peppers” to improve clarity.
– Siren Song: Imitate an ambulance sound by sliding from low to high and back down to stretch your voice.
– Deep Breaths: Breathe deeply and slowly exhale while counting. This gives your voice the air it needs to sound great.

For more vocal warm-ups, check out YouTube. Search for “vocal warm-up” to find routines led by experts.
Remember to warm up your voice daily, especially before recording, to sound your best.
Step 4: Proper Mic Technique
Treat your microphone like a friend, capturing every nuance of your voice. Position it correctly to get the most out of it.
Your voice can change with movement. To sound even and professional, stay at the same distance from the mic:
– Experiment with distances until your voice sounds best, then remember that spot.
– Keep the mic about a fist away from your mouth to capture your voice clearly without background noise.
– Point the mic directly at your mouth for better sound quality.
– Adjust the mic angle for comfort and to avoid unwanted sounds.
– Test your mic placement before recording for good audio quality.
Annoying sounds can mess up a perfect recording, such as finger tapping on the mic or loud pops.
To avoid these, handle your mic carefully. Use a sturdy mic stand and avoid knocking it over or shaking it during recording.
Step 5: Mastering Mic Settings
Want your recordings to sound professional? The secret is in your microphone settings.
First, get familiar with gain, volume, and polar patterns.

Tailor these settings to your environment and recording style.
– Quiet space: Keep gain low to avoid picking up background noise.
– Noisy space: Increase gain slightly, but be careful not to capture too much noise.
– Loud singing: Lower gain to prevent distortion.
– Soft speaking: Raise your voice to ensure it is heard clearly.
Always watch your audio levels. Avoid loud sounds (clipping), as they can ruin your recording.
Most recording apps display sound levels, so watch them and adjust settings as needed.
Step 6: Post-Recording Editing
You’ve recorded your awesome voice and want to make it even better? Get ready for some post-editing magic.
Here are a few easy tricks to polish your recordings to perfection:
– Magic Editing Tools: Use free programs like Audacity or GarageBand. They’re simple and have tools to fix your recordings.
– Silence the Unwanted Noise: Annoying background noise? Use “noise reduction.” Pick parts with just noise, and the program will quiet it down.
– Voice Fine-Tuning: Imagine adjusting dials to make your voice sound deeper, clearer, or brighter. That’s what EQ does. Play around to make your voice sound awesome.
– Smoother Sound: Compression makes your recording sound polished. It turns down loud parts and brings up quiet parts, keeping the volume the same.
– Level Up Your Skills: Once you’re comfy with these basics, explore fun effects like echo, slow motion, or even voice changers.
Step 7: Practicing And Seeking Feedback
Improving your recording skills takes time and practice.
Practice regularly and seek feedback. These can enhance your voice recordings.

Practice Makes Progress:
– Short & Sweet: Just 10-15 minutes of daily practice can improve your voice skills.
– Target Your Training: Focus on areas like clarity or expression.
– Play & Learn: Experiment with new techniques and have fun!
– Ask Trusted People: Seek advice on specific areas like clarity or tone.
– Stay Open to Learning: View feedback as a growth opportunity.
– Be Specific: Clearly state what you need help with (e.g., “Is my explanation clear?”).
Feedback from others is crucial, even when practicing solo. It provides fresh perspectives and identifies areas for improvement.
Conclusion
Remember these tips for making your voice sound amazing in recordings.
Figure out what makes your voice sound good and not so good.
Use a good mic and a pop filter (it helps reduce those popping “p” sounds).
Record in a place with no noise or echo. Do some vocal exercises to warm up your voice before recording.
Put the mic in the right spot and adjust the settings to make your voice sound clear.
Use editing tools to make your recordings sound even better.
Resources For Further Study
-“Voice Science, Acoustics, and Recording” By David M. Howard, Damian T. Murphy.
-“Voice Recording—Some Findings and Some Problems” by Ernest H. Henrikson and John V. Irwin.
- How To Keep The Conversation Going: 12 Expert Tips That Work - December 26, 2024
- Master Speech And Debate: 5 Essential Tips For Success - December 16, 2024
- 11 Communication Quotes To Inspire & Improve Conversations - November 20, 2024

Leave a Reply